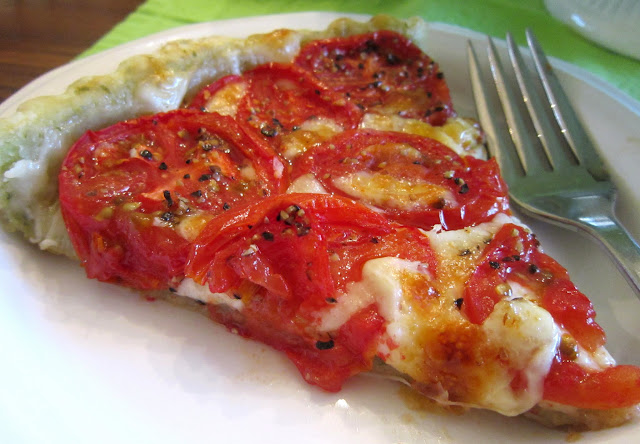
Well, we're quickly moving through spring, with summer just around the corner. I love all of the season's fruits and vegetables showing up in the market now! Something that we seem to wait for, all year, are those wonderful summer tomatoes. Red, ripe, and juicy "spheres of deliciousness" ! Beefsteak, heirloom, cherry, plum, pear......so many varieties and so many ways to eat them!! (All delicious, in my opinion)
I may have jumped the gun a bit, as far as "summer" tomatoes go, but I just couldn't help myself! I had these tomatoes that kept staring at me, from a basket on the counter, a basil plant perched on my kitchen windowsill, soaking up the sun, and plenty of mozzarella in the fridge. This recipe was just begging to be made!
If you're looking for a dish that's easy to put together, with few ingredients, and one that celebrates the taste of summer........look no further! This tart will do the trick! Make it for brunch, a light supper, include it on a buffet table, or bring it along on your next picnic...just make it!
Fresh Tomato Tart with Basil-Garlic Crust
1 recipe Basil and Garlic tart dough
8 ounces mozzarella cheese
about 1 pound ripe tomatoes
Salt and freshly ground black pepper
Extra-virgin olive oil
The first thing you want to do is make the tart dough so that it can chill. (It can be made ahead and kept in the fridge for several days or, even frozen, for up to a month.....just defrost in the fridge before using.)
For the dough:
1/3 cup fresh basil leaves1 medium garlic clove
1 1/4 cups all-purpose flour
1/2 tsp. Kosher salt
8 tblsp. unsalted butter, chilled and cut into 8 pieces
4-5 tblsp. ice water
Put the garlic and basil in a food processor and process until finely chopped, scraping sides of the bowl, if necessary.
Add the flour and salt and pulse to combine. Now, add in the butter and pulse about 10 times, or until you have crumbs about the size of peas.
Add the water, 1 tblsp. at a time, pulsing several times after each addition. After you've added 4 tblsp., process for several seconds to form a ball. If it doesn't come together, add the last tblsp. of water.
Take the dough out of the processor and flatten it into a 5" disk. Wrap it in plastic and place in fridge for at least 1 hour.
I love all those little specks of green!!
When you're ready to assemble the tart, take the dough out of the fridge and roll it out onto a floured surface into about a 12" circle.
Lay the dough over a 9-10" tart pan, with a removable bottom, and press it into the bottom and sides. Trim the dough and place in the fridge while you prepare the filling ingredients.
Isn't it pretty??
For the filling: Slice the mozzarella thinly. Core and cut the tomatoes, cross-wise, into thin slices.
Line the bottom of the tart shell with the cheese......then place the tomatoes over the cheese, in concentric circles, starting around the outside of the pan. Slightly overlap the slices. Season with the salt and pepper, to taste, and drizzle with the olive oil.
Place on a sheet pan and bake in a 375 degree preheated oven until the crust has become golden brown and the cheese has started to brown in spots, around 35-40 minutes.
Note: The dough will make enough to fit a 10" tart pan. I used a 9" pan and had enough left over to also make an individual size. The small one baked for about 30 min. Also.....if you'd like a crisper crust, try partially baking the crust before you add the filling.
Cool the tart on a rack for at least 5 minutes before slicing. Feel free to serve this tart hot, warm, or at room temperature. Also, experiment with some herbs. Fresh thyme or oregano would be delicious sprinkled on top!
That's some yummy, summery, goodness!!!
For printable recipe, click here.
Recipe from "The Complete Italian Vegetarian Cookbook", by Jack Bishop


This looks delicious! I am saving this recipe for my homegrown tomatoes. I have two that are almost ripe, right now! Thank you for the wonderful tutorial with all the gorgeous pictures! Great job!
ReplyDeleteThank you, Diane! Enjoy those delicious tomatoes! Hope you enjoy the recipe!
Delete